Want to add charming farmhouse-style bunnies to your Easter or spring decor? These DIY fabric bunnies are an easy & budget-friendly sewing project that brings a rustic touch to any home.
This handmade spring decor idea is perfect for beginner sewists or anyone who loves upcycling fabric scraps into adorable seasonal decorations!
Materials You’ll Need:
- Fabric of Choice: Consider using materials like denim or thick cotton fabrics. I found that calico quilting cotton and denim made great choices. Thinner cotton didn’t hold the shape the same way, but can definitely be used. This is a great upcycling and scrap busting project.
- Stuffing Material: Poly-fil is commonly used, but repurposing stuffing from an old pillow works just as well. I used stuffing from an old couch I deconstructed!
- Scissors: Pinking shears can add a decorative edge but could be optional.
- Bunny Template: You can freehand a bunny shape or use a printable template.
- Optional Embellishments: Items like ribbons or jute rope and pom-poms for tails.
1. Prepare Your Bunny Template:
- Draw a bunny shape onto cardboard or print a free template. Here is a link to some free printables I found. I used this image for my bunnies and scaled it to 90%. Key things to keep in mind is ability to get stuffing into the parts. Cut out the shape to create your pattern.
2. Cut the Fabric:
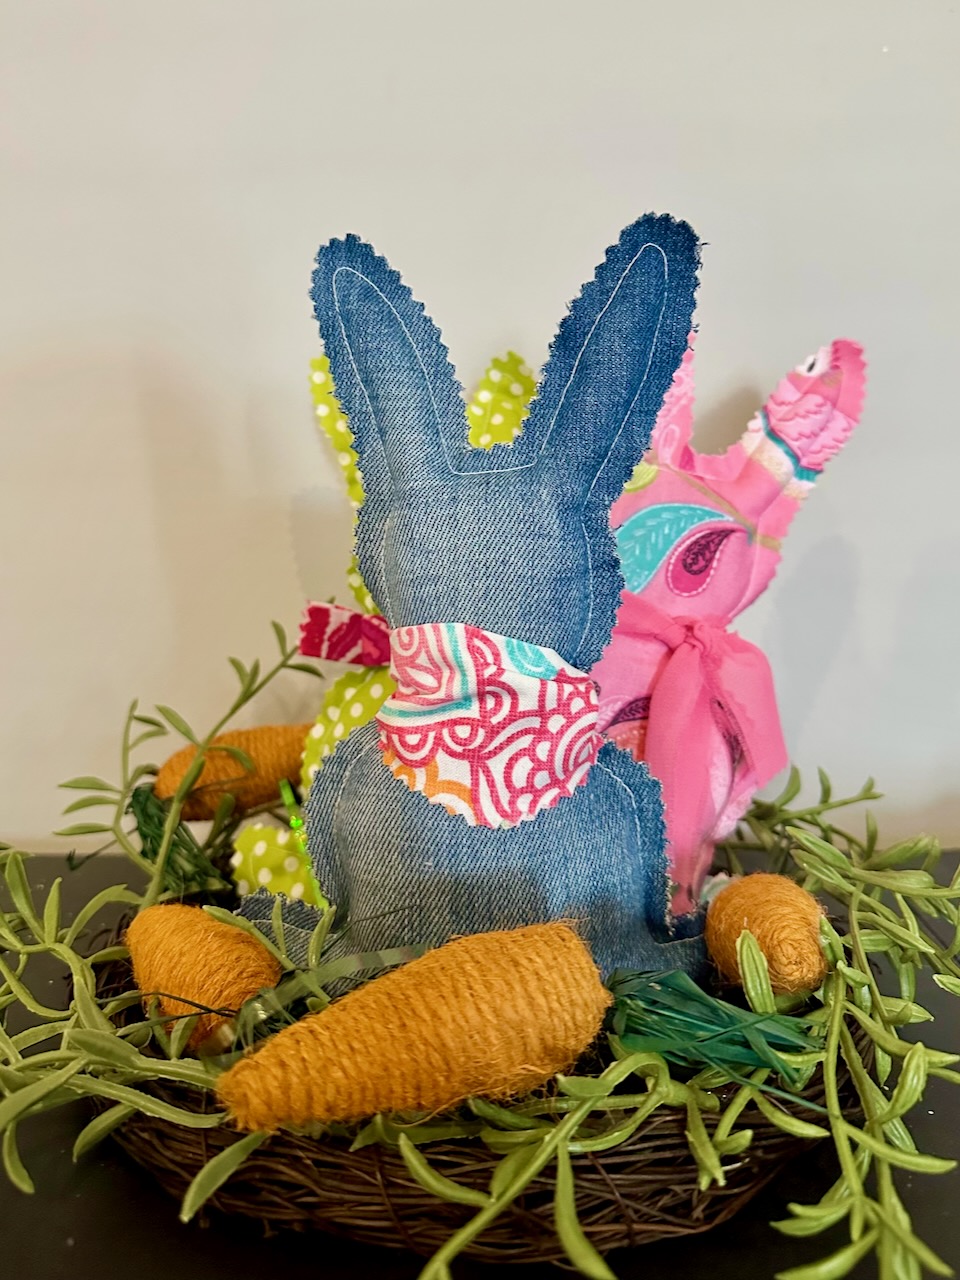
- I made this one from a leg of upcycled jeans and wanted to keep the stiching in the center. I also made several from just regular fabric and fabric scraps. Thicker cotton works best. If you have inexpensive stiff cotton that doesn’t drape well, it is perfect for this project.
- Pin the bunny template onto the fabric.
- Cut out the bunny shape, resulting in two identical fabric pieces.
- You can cut a few layers at a time making 2-3 bunnies, especially if you are making several bunnies from the same fabric.


3. Assemble the Bunny:
- Pin the fabric pieces together with the right sides facing out. This is what makes this project both easy and adorable! There is no turning inside out needed!
- Using a straight stitch with about 0.5″ or 1cm allowance, sew around the edges, leaving a small opening for stuffing. On my template, I found the bottom was the best location to leave open.
- Tip for pivoting when sewing: imagine you are tracing a line about 0.5″ inside the outline. If it’s a little imperfect, don’t worry, that’s part of the charm and it will come together at the end.


4. Stuff the Bunny:
- Gently fill the bunny with your chosen stuffing material.
- Here is my tip for filling the ears (or other small parts you might have):
- Get some fill into the head
- Using the back of a regular pencil, push the fill from the head into the ears. Do not overstuff.


5. Close the Opening:
Sew the opening shut securely after stuffing. Overlap the stitches a little bit or backstitch to make it secure. Clip all the threads.

6. Finish The Edge With Pinking Scissors:
- This is what brings the project to life. While the unfinished edge looks OK, I find that trimming with pinking scissors upgrades the project.
- Clip into the corners. Keep turning the bunny so you can work around it with the point of the scissors clipping into the turns.


7. Add Embellishments:
Tie a ribbon or lace around the bunny’s neck for added charm. You are done!

Did you try this project? Drop a comment below with your experience!