Why spend a fortune on gift wrap when you can make something better for less? I transformed clearance pajamas into reusable DIY fabric gift bags—a sustainable and budget-friendly alternative to traditional wrapping paper.


Finding Pajamas To Upcycle Into Fabric Gift Bags
Years ago, when my kids were very little, my mom sent me a pack of reusable foil gift bags along with the gifts for the kids. She knew I didn’t have time to wrap presents. Also, so many gifts are hard to wrap because they don’t come in a nice rectangular shape. I still wrap some presents, but use gift bags as well. The original pack has now been depleted and I wanted to make a new batch. I considered buying them. But even after the holidays were over, the bags sell for $1 or more on Amazon and come in a large pack.
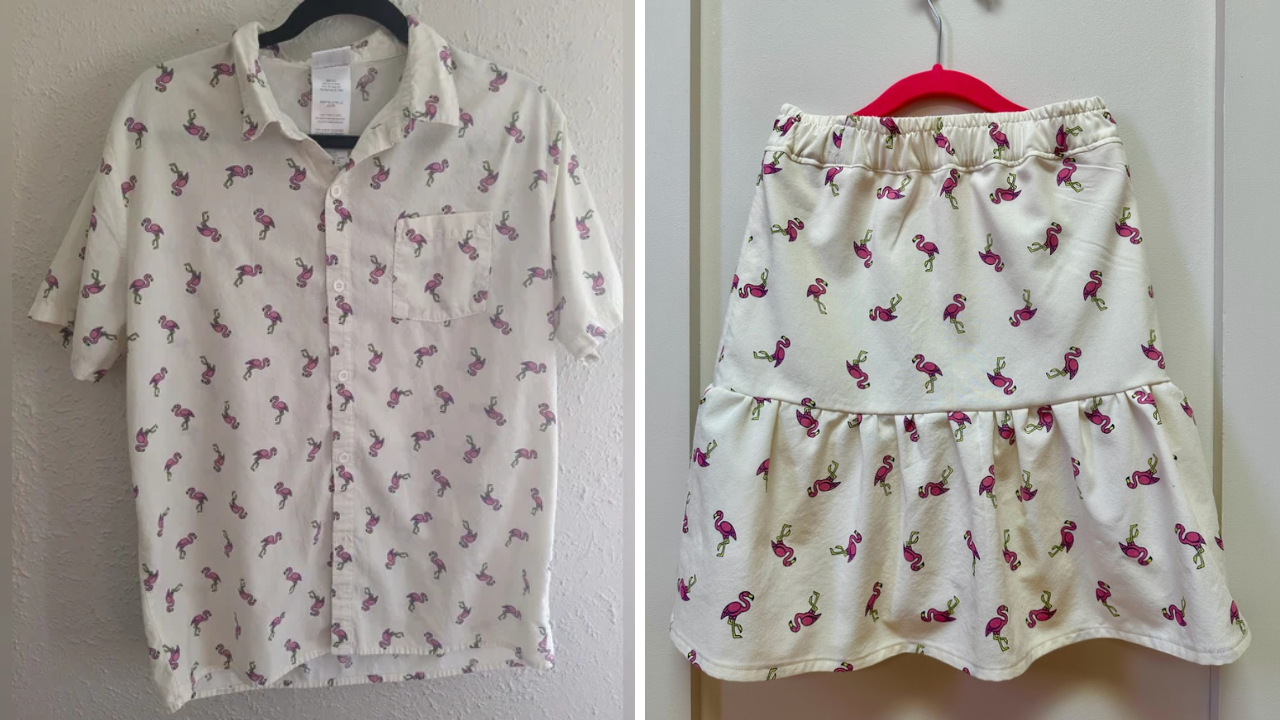
Fabric is also pretty expensive! It’s incredible but true – you can buy finished clothing for a lot less than buying the fabric. After Christmas, I found these XXXXL size flannel holiday pajamas on clearance at Old Navy for just $10. These pajamas have over 2 yards of fabric, so that’s less than $5 a yard. Even on sale, it’s hard to find fabric at this price! I was looking to make Christmas gift bags, but you can look for fun prints during other times of the year as well. Side note: I found these pajamas to be reasonably well made. I don’t know how the fabric would hold up in the wash, but generally I thought these weren’t bad if you buy them to actually wear. Good job, Old Navy.

How to Cut Pajamas into Fabric Gift Bags
Since these gift bags will not be worn, I didn’t need to wash these pajamas. I did iron them to make cutting easier and ready for assembly.
I wanted to keep the hem of the pants and cut those off first just before the pants start to taper out.


After that, I cut the pajamas up at the hems as close to the hems as possible. Pro tip: Do not cut through the waistband to save the elastic for another project. Save the buttons from the top as well.
I looked to maximize cuts while maintaining a range of bag sizes. I know that a lot of our gifts are toys, so variety or mid-sized bags are mostly used in our house. You may decide to cut this differently.


I wanted to save the pocket and thought it would make a cute bag. In my excitement, I made a mistake. I really should have used the two front panels to cut rather than cutting into the back. The back was one solid piece that could have made a really large bag.

Despite the mistake, I was able to cut plenty of bags and learned valuable tips for next time. I had only a few small scraps left and those were too small for anything useful. But would love to hear any ideas from you for the future.

Sewing Your Reusable Fabric Gift Bags
Now, we sew around 3 sides of these bags.

These bags are not going to have heavy wear and they won’t be washed. While I intend to use them over and over, they do not get a lot of wear each time. So there is no real need to finish seams nicely. I had my serger ready to go from something else I just finished, but if you use a regular sewing machine, just do a straight stitch and call it good. If you insist, you can create a french seam, that will be covered in another tutorial.
Now we finish the top hem. Just fold it over twice and top stitch. I like to iron the folds before sewing. I find that the end result is nicer and it’s much easier to sew because the fold stays in place and I make sure it’s even while ironing.

3 Easy Ribbon Options for DIY Fabric Bags
Separate Ribbon: The Most Versatile Option
If you are making these bags without knowing exactly what will be wrapped, I think this is the best option. If you choose this option, you are done! I like to keep the ribbon with the bags so I am not looking for it when I need it.

Using Pant Leg Hems As Gussets
Remember those pant legs? I carefully cut two openings in one side using my seam ripper and inserted the ribbon using a safety pin. Pro tip: Fold the bag in half to find the middle and then make the cuts evenly spaced from that line. You can also create a gusset by creating a wider hem when sewing, enough to fit your desired ribbon.


Attaching Ribbon: Keep It Simple
It’s similar to the first option, but you determine the position of the tie ahead of time. Pro: the ribbon will stay with your bag and won’t get lost! Con: you are somewhat locked into the size of what can be put inside. I attach the ribbon just high enough to leave a nice bunching at the top and maximize the bag size. I repurposed the waistband ribbon from the pajamas for these ones.


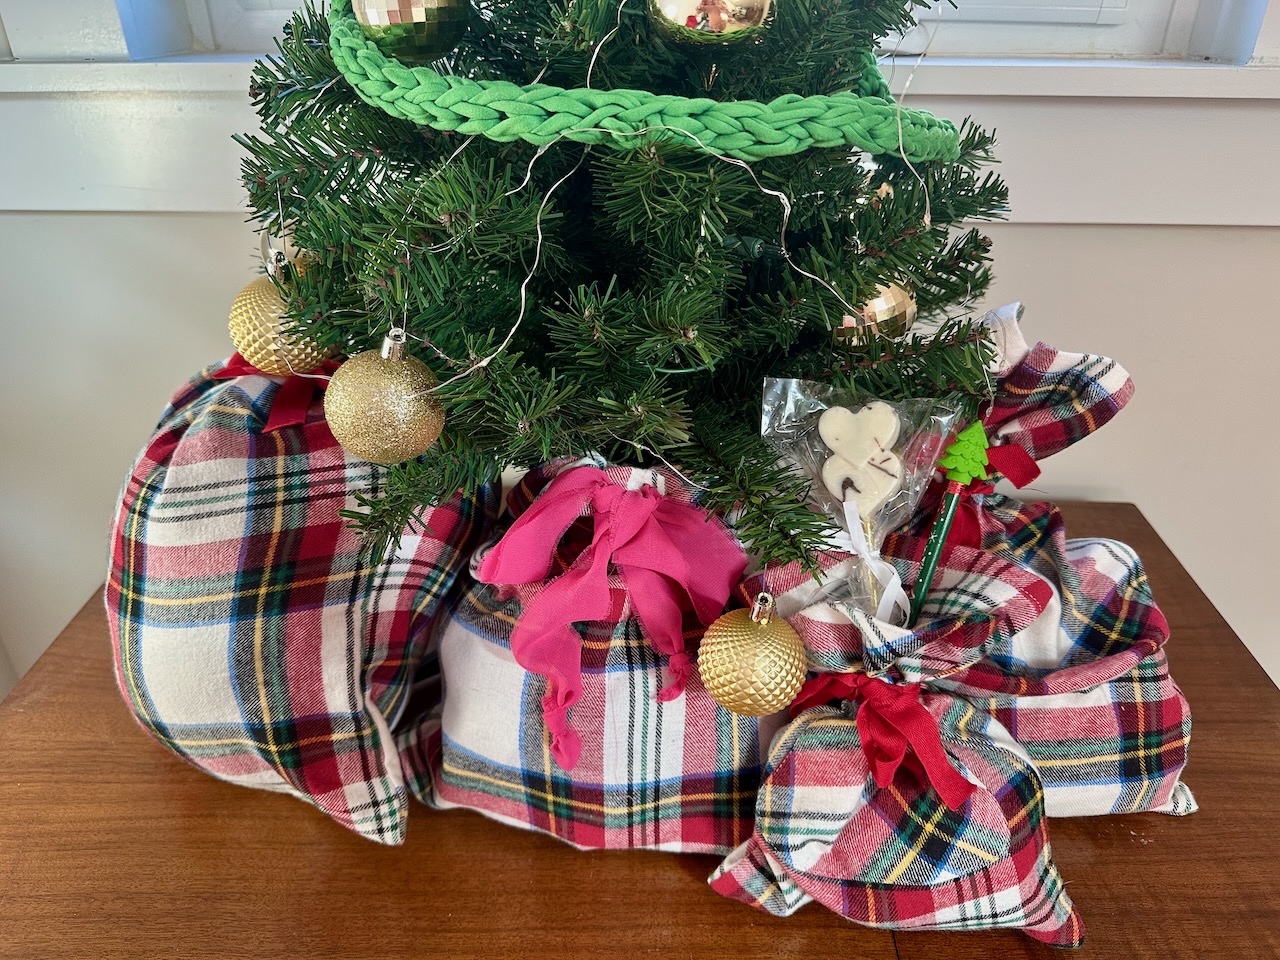
This is it! I ended up with 12 bags in a variety of sizes. That works out to less than $1 a bag. You can get a lot more bags if you are making small bags, for example for class gifts. This project saved me money and gave a second life to clothing that might have ended up in the landfill.

Have you tried upcycling fabric into gift bags? Share your tips, photos, and questions in the comments below — I’d love to see your creations!