Looking for a creative way to reuse those colorful Easter or Halloween candy bags? This DIY candy bag zipper pouch is a fun, beginner-friendly sewing project that upcycles plastic packaging into something cute, functional, and totally unique!
You can use candy bags, chip bags, or other food wrappers to make these pouches perfect for organizing small items, travel toiletries, pencils — or even to give as gifts!
🧵 Materials You’ll Need:
- Empty candy bags (clean and dry)
- Parchment paper or baking paper (⚠️ not wax paper)
- Household iron
- Scissors or rotary cutter
- Zipper (6–9 inches works well — I often reuse zippers from old clothes!)
- Sewing machine (or hand sewing needle and thread)
- Clips or binder clips (don’t use pins—they’ll puncture the plastic)
- Cotton fabric or fusible interfacing (optional lining)
- Pinking scissors (optional – for decorative edges)
🔥 Step 1: Clean & Prep the Candy Bags
Make sure your plastic wrappers are clean and dry. Cut away the seams or gussets so you’re left with a flat, single layer. You can use just one bag or piece several together for a collage look.
I ripped my bags before I thought of this project. Ideally, open them carefully by cutting away the seam in the first place.

🧲 Step 2: Fuse the Plastic
This is where the magic happens!
- Lay out the candy bag folded so you have 2 layers.
- Sandwich the plastic between two sheets of parchment paper.
- With your iron on low to medium heat (no steam), press the paper for a few seconds at a time, moving slowly. I used the wool setting on my iron.
- Move your iron around, spend only 1-2 seconds in each spot. Check frequently. The plastic will shrink slightly and take on a smooth, slightly matte texture.
- Once fused and cooled, square off the plastic.
💡 Tip: Different plastics react differently to heat! If you can, try a swatch first.


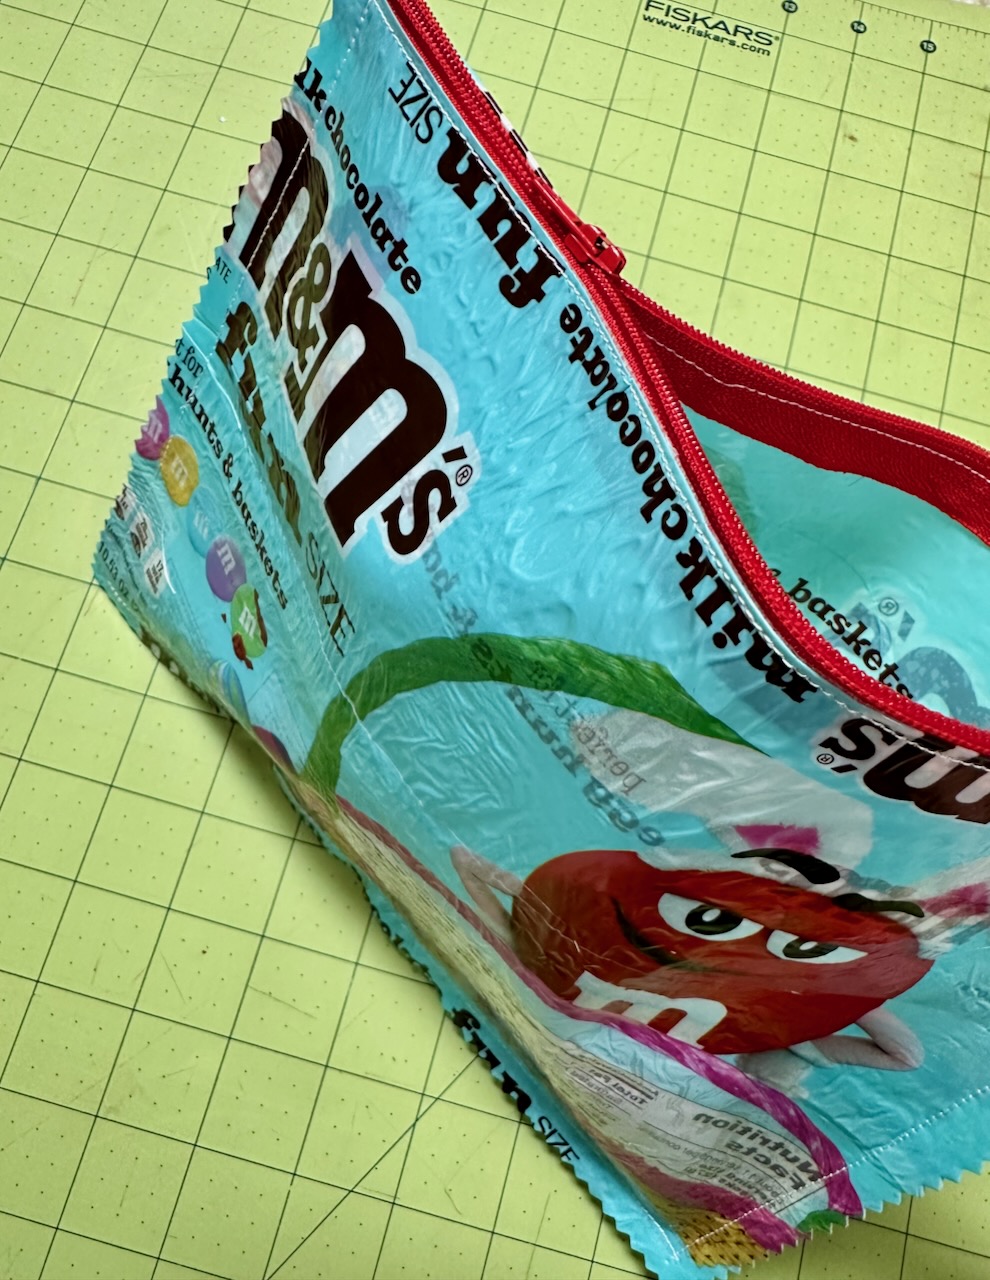
🔗 Step 3: Attach the Zipper
- Place the zipper face-up on a flat surface.
- Align your fused plastic so the top edge meets the zipper tape.
- Double-sided tape is a great way to secure the plastic to the zipper. Otherwise, use clips. Do not use pins!
- Sew across using a zipper foot for best results.
- Trim the zipper to match the pouch width. Ensure the zipper pull is inside before you cut!


🧵 Step 4: Finish the Pouch
- Fold the pouch so right sides are facing out (no turning inside out required!)
- Sew around the three remaining sides with a ¼” (0.5 cm) seam allowance.
- For a decorative finish, trim the edges with pinking scissors (use a ½” or 1 cm seam allowance if you plan to do this).


🐣 That’s it!
You’ve just made a durable, waterproof, and totally upcycled candy bag zipper pouch! It’s great for school pencil bags, organizing small items, or travel. I love keeping small bottles of shampoo and body wash in these for travel so they don’t spill all over.
🌎 Why This Project Rocks:
✅ Eco-friendly — keeps plastic out of landfills
✅ Budget-friendly — uses trash, scraps, and leftover zippers
✅ Customizable — use your favorite snack or candy packaging
✅ Beginner-friendly — basic sewing & simple materials
💬 Share Your Creations!
Have you tried making your own candy bag pouch? I’d love to see it!
📸 Tag me on Instagram @upcycleandthrive or
💬 Leave a comment below with your photos, questions, or pro tips!
🛍 Want more fun and sustainable sewing ideas? Check out my other upcycled DIY projects for beginners.